You can boost your focus and get more done by expanding your workspace with a second screen. Adding extra display space makes it easier to keep email, chat, and reference docs visible while you work on a main task. Most modern graphics hardware lets your computer drive two monitors without fuss.
Plan your desk and ergonomics so your eyes and neck stay comfortable. Use stands or monitor arms to set heights and angles. Then use the Start > Settings > System > Display path to arrange how each screen behaves.
With a smart setup you can dedicate one monitor for focused work and another for supporting tools. Matching sizes or mixing compatible displays reduces strain and keeps your workflow smooth across the desktop.
Key Takeaways
- Extra screen space keeps reference windows open and reduces window switching.
- Use one display for focus and another for tools to stay organized.
- Modern systems usually handle two monitors well; check performance at higher resolutions.
- Adjust height and angle with arms or stands for better ergonomics.
- Fine-tune arrangement in Start > Settings > System > Display before you begin.
Why dual monitors boost productivity right now
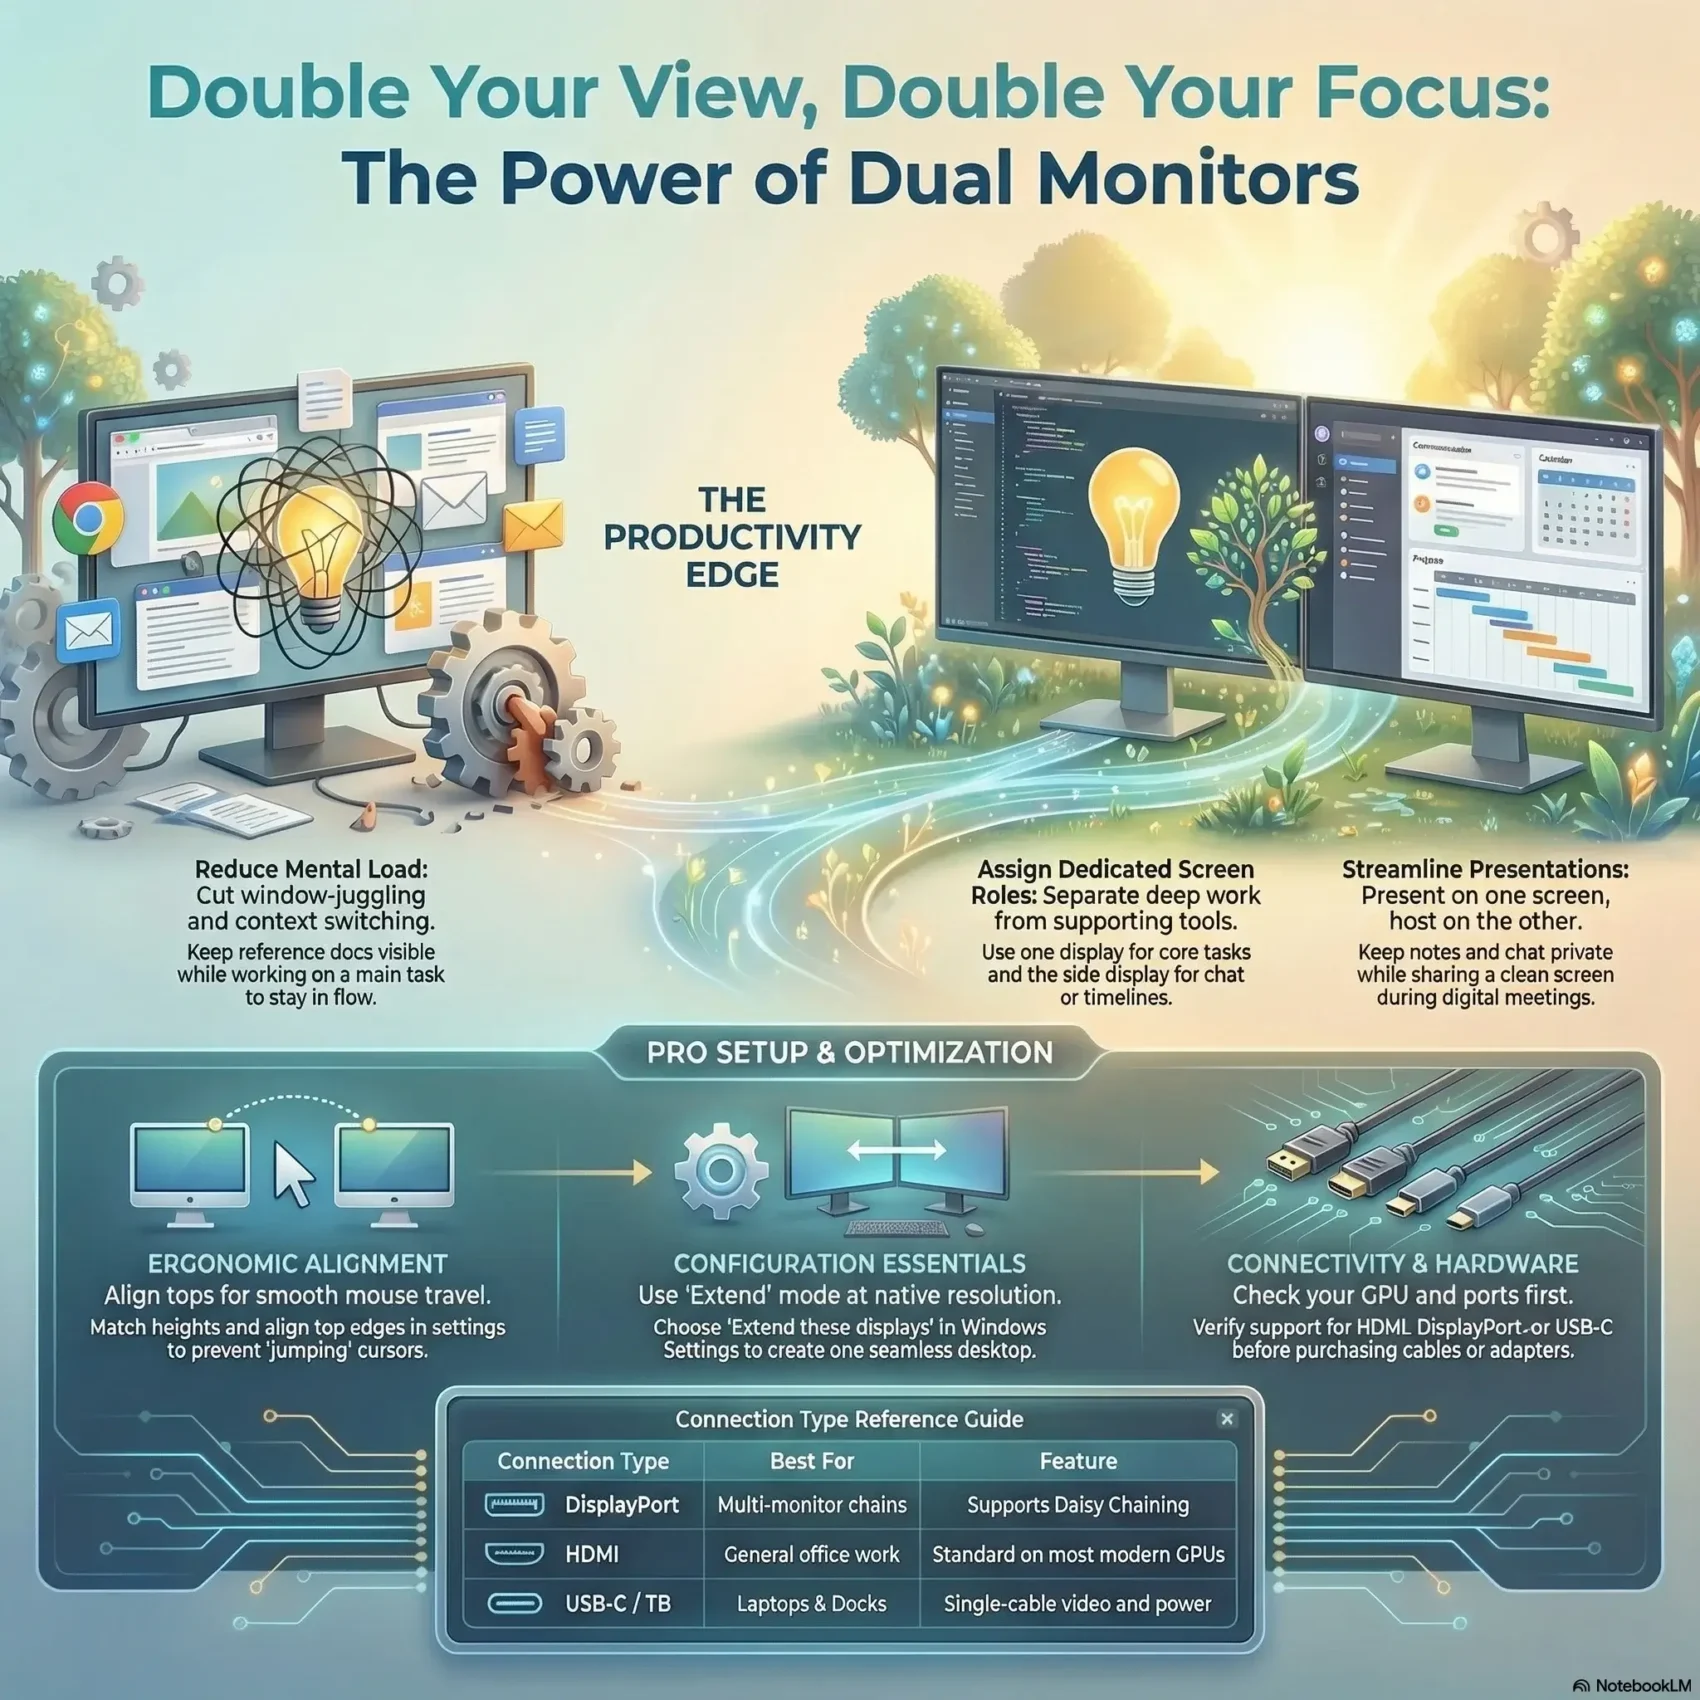
Expand your view, reduce friction. Adding a second screen gives you more working space so your main task stays visible while reference apps remain in sight. That reduces the need to minimize or shuffle windows and keeps your flow steady.
Match your intent: multitask without window-juggling
Assign one display to focused work and the other to supporting tools. For example, keep code, writing, or design full screen while chat, research, or timelines stay on the side. This cuts context switching and lowers mental load.
Gain screen real estate to focus better and switch faster
With more displays you can arrange windows side by side and keep dashboards visible. That reduces clicks and speeds decision making.
- You’ll move less between apps, so your mouse and eyes travel less.
- Present on one screen while notes or chat stay on the other for smooth delivery.
- Simple layout tips make moving mouse across multiple panels feel natural even with different resolutions.
Spreading tasks across two panels can make your desktop feel more like a real workspace.
What you need before you start: monitors, graphics support, and cables
Start by confirming what screens, ports, and cables your setup actually needs. Pick displays that fit your desk and match in size and resolution when possible. Using similar resolution and refresh rates makes moving windows and scrolling feel smooth.
Choosing displays: size, resolution, refresh rate, and mixing models
Choose a monitor size and resolution that suit your tasks. Editors and designers benefit from higher resolution. For general office work, 1080p or 1440p works well.
Mixing display types is possible. You may need to tweak scaling or color settings so text and windows align across screens.
Graphics card and ports: HDMI, DisplayPort, USB‑C, and daisy chain support
Check your computer’s GPU to confirm the number of outputs it supports. Most modern cards handle two monitors; three or more need extra ports.
Decide which port you’ll use—HDMI, DisplayPort, or USB‑C—and match that to the monitor input. If you lack outputs, look for displays that allow a DisplayPort daisy chain to reduce cable clutter.
Cables, adapters, and desk setup: stands, arms, and ergonomic layout
Gather the right cables and any adapters now (for example, USB‑C to HDMI) so you’re ready to plug in. Sturdy stands or a dual‑arm mount keep screens aligned at eye level.
- Confirm the number of ports on your computer and each display.
- Pick cables that match video ports to avoid last‑minute trips.
- Measure desk depth and plan layout so you maintain a neutral posture.
Tip: You don’t need special software to connect two displays, but utilities can help with color or hotkeys later.
Physical setup: connect your monitors the right way
Before you plug anything in, map the ports on your computer and each display. That quick check saves time and prevents mismatched cables later.
Gather your gear and power on safely. Turn off your PC first. Set each monitor on its stand or arm and route cables so they won’t pinch when you slide the screens into place.
Gather your gear and power on safely
Make sure you have HDMI, DisplayPort, or USB‑C cables for each monitor. Label ends or note which port each display uses — it makes later rearranges simple.
Plug in video cables to the correct HDMI/DisplayPort/USB‑C ports
- Power down the computer, then connect each display with its matching cable—HDMI to HDMI, DisplayPort to DisplayPort, or USB‑C where supported.
- Tighten thumbscrews on DisplayPort connectors and fully seat HDMI plugs to prevent flicker from loose connections.
- Verify the correct input on each display’s on‑screen menu before you boot the PC.
- If supported, daisy chain via DisplayPort: PC → first monitor → second monitor for a cleaner run.
Tip: Once everything is connected, power on your computer and confirm both displays wake up; swap cables or ports to isolate any issue.
To keep your desk tidy and serviceable, keep cable ties or original boxes handy. If you want to declutter your cables, label and bundle extra length now so your setup stays reliable.
Configure Windows display settings step by step
Begin at Start > Settings to identify and place each screen for smooth movement.
Open Start, go to Settings > System > Display and click Identify. Each screen shows a number so you can choose display icons that match which monitor sits where on your desk.
Drag and align the tops for smoother pointer travel
Drag the monitor icons in the Display view to match your physical layout. Align the top edges so your mouse crosses naturally between screens without jumping.
Choose Multiple displays and confirm the setup
Under Multiple displays pick Extend these displays to make one larger desktop. Use Duplicate only for mirroring demos. Click Apply and then Keep changes after you test.
Set your main display and tune Scale and layout
Select the panel you want as your main display and check Make this my main display. The taskbar and Start menu will appear there.
- Set each monitor display to its native resolution.
- Use Scale and layout to change orientation and fine‑tune text clarity.
- Adjust refresh rate if scrolling feels choppy, then test by moving apps between screens.
Tip: If windows jump or the pointer misaligns, recheck top alignment, resolution, and scale so everything behaves as expected.
Optimize your workflow across multiple displays
Set clear roles for each screen so your work flows without friction. Place focused apps where you do deep work and supporting tools where you glance for updates. This simple plan trains your eyes and reduces wasted time.
Design your desktop across two monitors: primary vs side tasks
Assign a primary monitor for core tasks and use the side display for secondary work like chat, timelines, or references. Keep creation tools on the left and communication on the right so your mouse and attention move predictably.
Calibrate brightness and color for consistency across screens
Use each monitor’s on‑screen display (OSD) to match brightness and contrast so whites and grays stay consistent. If motion feels choppy, check and align refresh rates to smooth dragging and video playback.
- Snap windows to halves or thirds to keep a tidy layout and reopen apps on the same screen to save time.
- Reserve top corners on the main display for critical alerts and push low‑value notices to the side screen.
- Consider a portrait orientation on the secondary panel for long documents or chat threads.
Tip: Revisit your layout monthly—small tweaks often unlock bigger efficiency gains.
Troubleshooting and pro tips for dual monitors
When screens act up, quick checks often fix detection problems before you dive deeper.
Fix detection issues
Make sure cables are fully seated and the correct input is selected in the monitor menu. Then go to Start > Settings > System > Display and click Detect.
Restart the computer after reseating connectors. Many handshake faults on HDMI or DisplayPort clear with a reboot.
Solve mismatch problems
If text or icons look off, set each display to its native resolution. If bandwidth is limited, try a lower resolution until signals stabilize.
For edge-to-edge accuracy when moving mouse, align the tops in Display settings and consider matching resolutions across screens.
Laptop-friendly options
If your laptop has one port, use a docking station like Dell WD22TB or an adapter like Dell DA310 to add more outputs. Portable dual-screen extenders can offer two 14–15.6″ Full HD panels, run via one or two USB‑C cables, and often work plug-and-play without extra software.
Keep a small box of spare cables and adapters handy so you can isolate whether a cable, port, or monitor is at fault.
- Try another hdmi cable or switch to DisplayPort/USB‑C to test the video path.
- Check the hdmi port labeling on your GPU — some ports are shared or disabled when the number of outputs is exceeded.
- If orientation or other changes won’t stick, reapply the setting and update GPU drivers.
Conclusion
A clean, intentional layout saves time and keeps your main apps in view so you can work with fewer interruptions.,
Use Windows Settings (Start > Settings > System > Display) to Arrange, Extend, or set a main display. That quick trip into settings locks your desktop and makes moving windows predictable.
Keep focus on one monitor and park references on the other to cut context switching. If you hit issues, check ports, inputs, and resolution alignment before replacing hardware.
Your setup can grow: docks, adapters, and portable extenders offer flexible paths as needs change. Revisit arrangement and scaling now and then to keep your screens comfortable and efficient.